Replacing the float needle valve seat bushing
 Again and again you hear that the carburetors overflow at standstill because the aircraft
is a taildragger.
This is wrong.
The Bing carburetors come from a BMW motorcycle and are therefore designed for high acceleration and deceleration values.
If fuel drips from a carburetor when stationary, it is most certainly not due to the inclination of the carburetor.
…. As always, problems usually start quite harmlessly:
one morning there is a small stain under the plane. Cooling water ? Engine oil ?
After the finger test you are sure: engine oil, because it is so greasy.
Cowling down, flashlight search and lo and behold, the engine is completely tight - or just as leaky as ever.
Must have been too much oil in the oil tank - then it just drips out of the breather hose.
After weeks in which there was always a small stain on the floor, then the surprise:
It stinks of fuel in the hangar and there's a huge pool of fuel under the plane.
How is that supposed to work, they did a 200h check a week ago and, as a precaution, installed new float needle valves to possibly banish the strange stains under the engine.
…. and here it comes: Carburetor checked 3 times and constantly the same game with the overflowing carburetors 1).
Anyone who was lucky enough to come across this post in the UL forum will perhaps remember similar pictures:


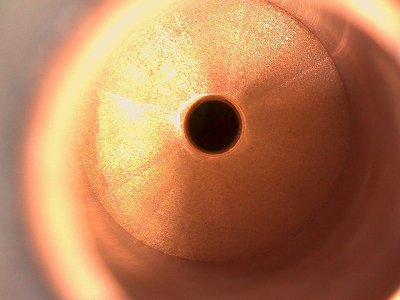
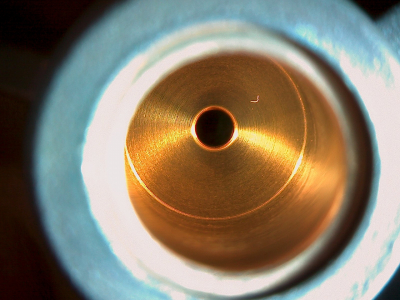
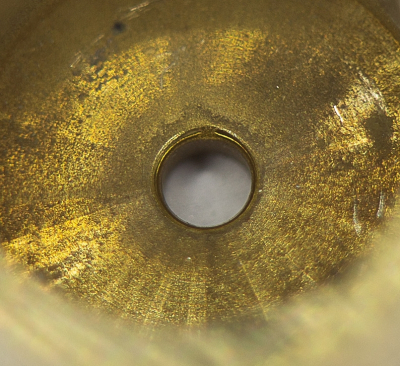
Float needle valve seats under the microscope
– the first picture was taken after 120 operating hours
The third picture is by © Steffen E. and is a very clear example as a supplement to his post in the UL forum.
The advice obtained from the trusted Rotax dealer is devastating: Replace carburetor - price = 4 digits.
But now you can resort to a repair method not approved by Rotax. Replace the valve seat bushings.
You can order them --here-- and replace them relatively easily with the --self-build tool--.
Carry out the work as follows:
- Remove the overflowing carburetor and disassemble it completely,
- use an M8 tap to cut a thread in the bushing,
to do this, grease the front of the tap properly to catch the chips - Screw the screw of the tool with the nut and the extraction bushing into the valve seat and pull the valve seat bushing into the tool
- flush the fuel inlet with brake cleaner, blow it out and check for swarf
- sparingly wet the outside of the new valve seat bushing with Loctite 221 or 243
– Loctite is used as a lubricant and for sealing - Press in / hammer in the bushing with the insertion tool
- Install the float and float needle valve
- Adjust the float level with --Gauge--
- Complete and install the carburetor and synchronize the carburetors
You should now have some peace and quiet for a while…..


